As an admin or super-admin of one of the chatbots, you are able to manage the users of the chatbots, control the settings for the model’s behavior and set the model configurations.
Model Settings
Model Behavior
-
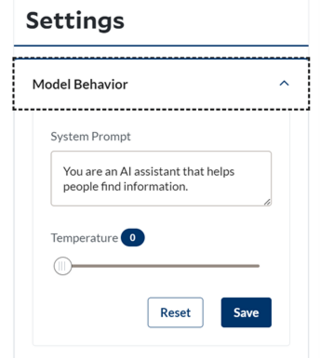
The Model Behavior section appears under the “Settings” on the website. In this section you can adjust the temperature of the model and set the system prompt. Please note that in some of the chatbots the system prompt will appear under the Model Configuration section.
-
The temperature controls the variance of the model’s responses. A higher temperature makes the response more creative and less predictable. A lower temperature makes the response more predictable. You can use the slider to increase the temperature with 0 being the lowest and 1 being the highest value.
-
The system prompt allows you to adjust the predefined text or message that guides or instructs the user during an interaction. You can think of it as the personality of the chatbot and you can tweak it to fit your purpose. Examples of a system prompt that you can insert into the Systems Prompt include:
-
Empathetic Communication: Prioritize empathy and understanding in your interactions with users.
-
Instructive Responses: Provide instructive responses, guiding users through steps or processes.
-
Storytelling Mode: Frame responses in a storytelling mode, creating narratives when possible.
-
-
If you decide to change the system prompt or temperature, remember to save these changes. You can always use the “Reset” button to apply the default settings which is a temperature that is set to 0 and the system prompt is set to “You are an AI assistant that helps people find information.”
Model Configuration
-
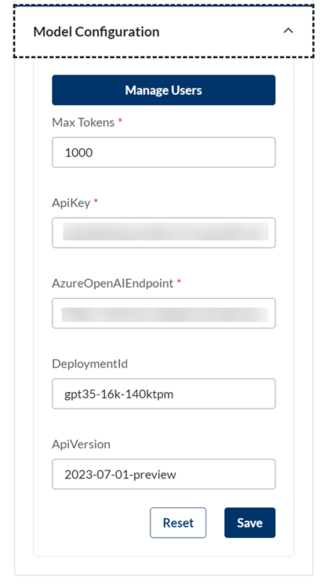
The Model Configuration section appears under the “Settings” on the website. This section provides additional information about the number of tokens, the API key, the endpoint, deployment ID and API version. In addition, you can modify user’s roles and access in this section by navigating to the “Manage Users” page.
-
For some chatbots the system prompt and other functionalities also appear in this section.
-
In the deployment ID you can see which model is used for your chatbot.
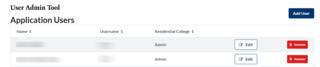
Manage user’s access
In the Model Configuration section, you can navigate to the Manage Users page which allows you to modify users’ roles and access.
-
The “Edit” button allows you to change the role of the user.
-
The “Remove” button allows you to remove a user’s access.
-
The “Add User” button allows you to grant a user access to the chatbot. To add a new user, you will need the NetID of the user and select the role that the user should be granted.